MotivatEM
Install & Support Guide
Select the product you purchased to see the correct installation instructions.
Tap your product above to load its guide.
Replacement Tubing
Install steps
- 1Grip your chestpiece stem and remove the old tubing with a firm twist and pull.
- 2Press the new tubing assembly onto the stem until it seats fully. It should feel snug all the way around.
- 3Give the joint a gentle tug to confirm the seal. No wobble, no gap.
- 4Put the ear tips in and tap the diaphragm lightly to confirm clear sound.
Check your fit
Made to fit:
- Littmann Classic III
- Littmann Lightweight II SE
- Littmann Pediatric
- MDF Acoustica and MD One
- ADC Adscope 603, 605, and 619
Not compatible with:
- Littmann Cardiology III or IV
- Electronic stethoscopes
In the box
- Complete tubing assembly
- Color-matched ear tips, pre-attached (removable)
Troubleshooting
The tubing feels loose on the stem
Remove it and press it back on with firmer, even pressure until it fully seats.
Sound is muffled after the swap
Check that the tubing is seated all the way and that the ear tips are pressed on until they click.
The old tubing will not come off
Warm the joint in your hands or under warm (not hot) water for a minute, then twist while pulling.
Replacement Part Kit
Install steps
- 1Peel the old diaphragm rim off the edge of the chestpiece.
- 2Stretch the new diaphragm rim evenly around the chestpiece edge until it sits flat all the way around.
- 3Fit the bell cover over the bell side of the chestpiece.
- 4Pull the old ear tips off and press the new ones on until they click.
- 5Ear tips in, tap the diaphragm lightly to confirm clear sound.
Check your fit
Made to fit:
- Littmann Classic III
- Littmann Cardiology III
- Littmann Cardiology IV
- Master Cardiology version of the kit: fits Littmann Master Cardiology only
Not compatible with:
- Other brands or models not listed
In the box
- Diaphragm
- Bell cover
- One set of snap-on ear tips
- Tubing and chestpiece are not included
Troubleshooting
The diaphragm looks wrinkled
Take it off and re-seat it, working the rim around evenly instead of stretching one side.
I hear a whistle or air leak
The rim is not seated all the way around. Run a finger around the edge and press it flat.
An ear tip came off in my ear
Press the tips on until you feel them click. A seated tip should resist a light twist.
Ear Tips
Install steps
- 1Pull the old ear tips straight off the ear tubes.
- 2Press the new tips on until they click into place.
- 3Give each tip a light twist. A seated tip stays put.
Check your fit
Made to fit:
- Littmann Classic III
- Littmann Cardiology III
- Littmann Cardiology IV
Not compatible with:
- Models with threaded (screw-on) ear tips
In the box
- One pair of soft snap-on ear tips
Troubleshooting
Sound is muffled
The tips are not fully seated. Press until they click.
They feel uncomfortable
Rotate the ear tubes slightly forward. The tips should point toward your nose, following the ear canal.
AirTag Holder
Install video coming soon. The illustrated steps below cover the full install.
Install steps


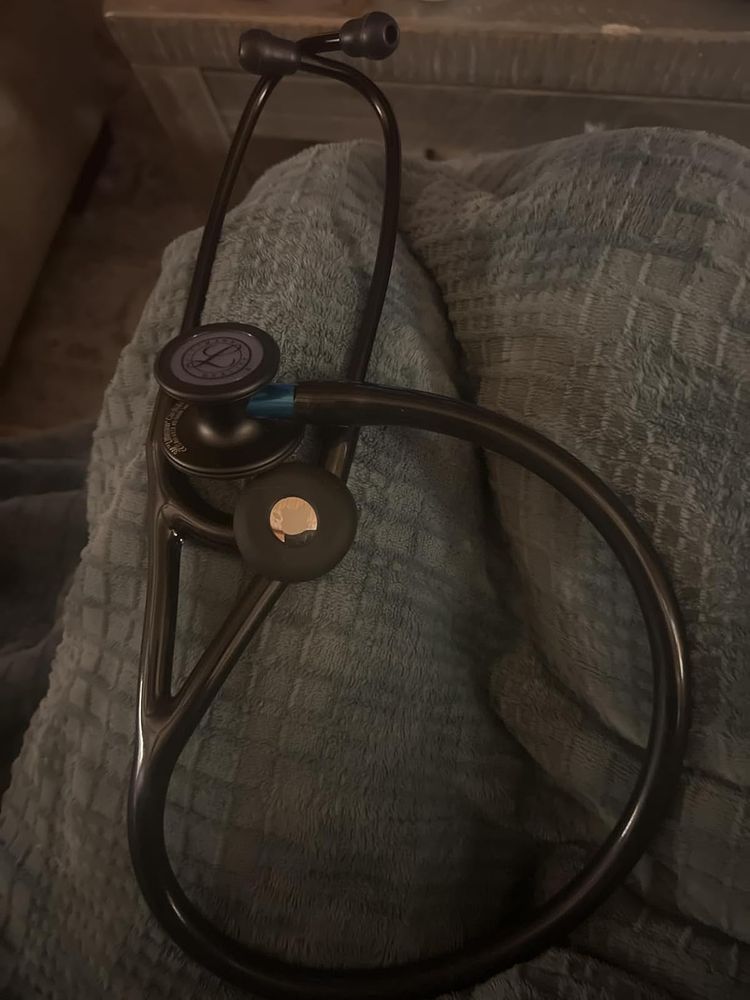
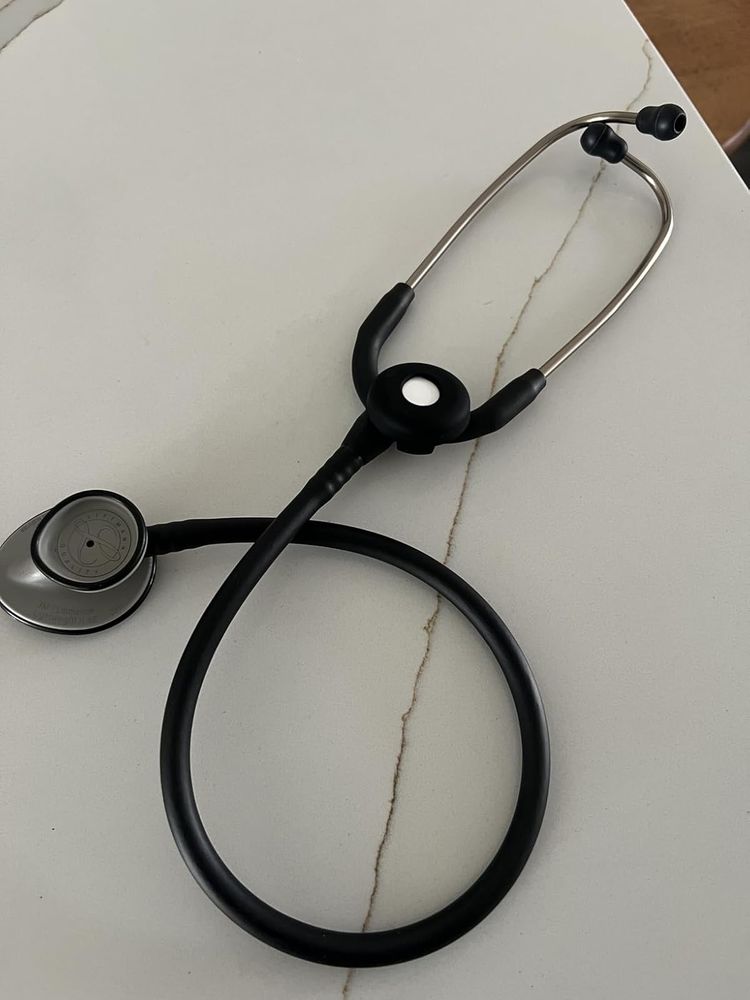
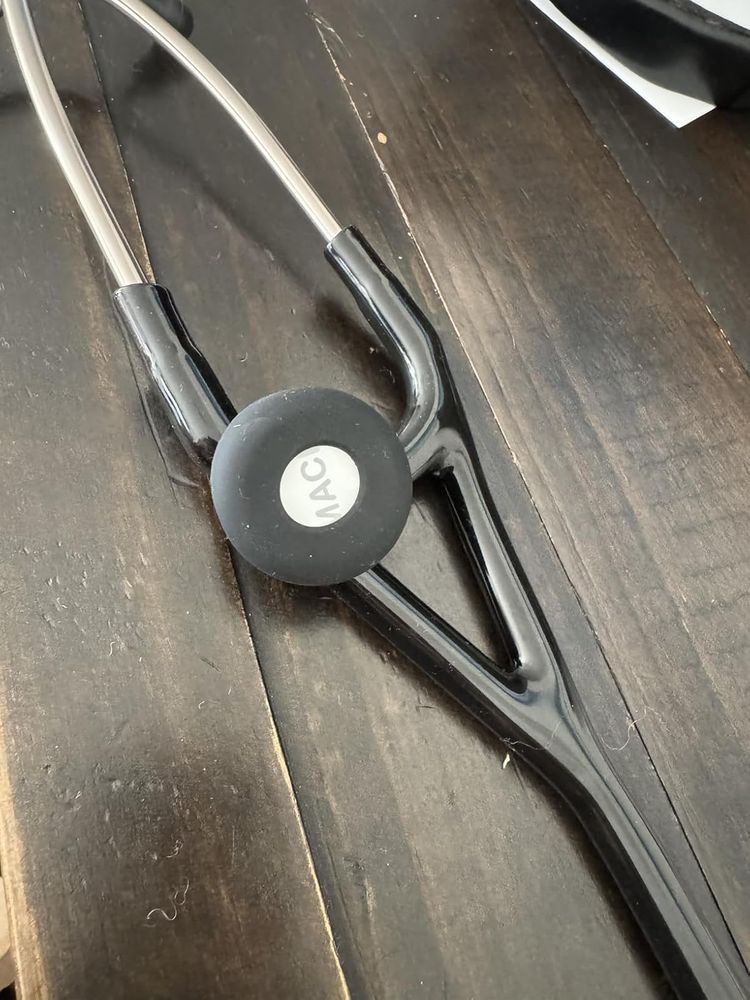
- 1Feed one ear tube (binaural) through the holder, starting at the ear tip end.
- 2Slide the holder down the ear tube until it sits at the center, where the ear tubes meet the tubing.
- 3Press your AirTag into the ring until it sits flush on both sides. The AirTag is not included.
What a correct install looks like

Check your fit
Made to fit:
- Fits over one ear tube (binaural) on most standard stethoscopes
- Inner case fits the standard Apple AirTag (37 mm)
In the box
- AirTag holder only. The AirTag itself is sold by Apple and is not included
Troubleshooting
The holder slides around
Seat it down at the center, where the ear tubes meet the tubing. The taper holds it in place there.
The AirTag feels loose
Press it in until it sits fully flush with the ring on both sides.
Do I pair the AirTag before or after installing?
Either works. Pair it to your iPhone in the Find My app; the holder does not affect pairing or signal.
Hip Holder
Install video coming soon. The written steps below cover the full routine.
Clip the holder to your waistband or belt first. Then:
How to store your stethoscope
- 1Place the tubing nearest the ear pieces into the front nook.
- 2Pull the tubing up and around the top of the holder and place it into the back nook.
- 3Slide your hand down, grab the diaphragm, and place it securely into the center holder.
How to remove your stethoscope
- 1Grab the bell with your dominant hand and remove the stethoscope head from the center holder.
- 2While keeping the diaphragm and bell in hand, place your index finger into the nook at the top of the holder.
- 3Use your index finger to pull up on the tubing slightly, then pull outward, away from your body, to completely remove the stethoscope.
Check your fit
Made to fit:
- Common dual-head stethoscopes
- Single-head stethoscopes
Not compatible with:
- Littmann Master Cardiology (as pictured)
- EKO electronic stethoscopes (as pictured)
In the box
- Hip holder with 180 degree rotating clip
Troubleshooting
It hits the chair when I sit
Use the rotating clip to swing the holder forward or back until it clears.
The stethoscope pops out when I move
Re-seat it: tubing into the front nook, up and around into the back nook, then the head securely into the center holder.
Support
Need a hand, or not a perfect fit?
Tell us where you purchased and we will make it right.
Purchased on Amazon
Contact us through Amazon Buyer-Seller Messaging so we can see your order and resolve it fast:
- Go to Your Orders on Amazon
- Select your MotivatEM order
- Choose Get product support, or Contact seller
Purchased on medmotivate.com
Email us with your order number and what happened. We answer every message.
support@medmotivate.com